Set up Ledger Nano S Plus
In our blog post What is a wallet? we explained the basic principles behind so-called "wallets" and showed the differences between hardware and software wallets. If you have chosen a Ledger hardware wallet based on this information, you can learn how to set it up step-by-step in this guide. If you haven't yet explored the different types of wallets and have not yet selected one that suits your requirements, we advise reading the blog post What is a wallet? first.
Our instructions are based on the Ledger Nano S Plus model but can also be applied to other wallet models produced by Ledger.
Ledger Nano S Plus
Discover the first and only certified hardware wallet for the secure storage of your NFTs and cryptocurrencies.
Step 1: Unboxing
The hardware wallet Ledger Nano S Plus comes with the following accessories:
1 hardware wallet
1 USB-C to USB-A cable
1 getting started leaflet
3 recovery sheets
1 keychain strap
To set up the Ledger, you will need the hardware wallet itself, the USB cable, and one of the three recovery sheets. You can put the remaining accessories back in the packaging.
Step 2: Install and launch Ledger Live
Go to ledger.com/start and download and install the software that is appropriate for your operating system.
After installing Ledger Live, launch the application and click on the "Get Started" button to begin the preliminary steps of the setup process. The first thing you need to do is select the model you purchased. In our case, it is the Ledger Nano S Plus.
In the next step, you will be asked whether you are using your Ledger for the first time or if you already have a recovery phrase. Select "Set up a new Ledger Nano S Plus".
You will learn some basic information about the technical background, such as the fact that your assets are not stored on the hardware wallet itself but on the blockchain, and the wallet only serves as a key to access them. Of course, you can complete the Ledger setup without any in-depth knowledge of the technology behind it, but it is recommended to at least read through the basics.
Click on the "Let's get started" button on the last page of the basics to begin the actual setup process.
Step 3: Ledger setup
At the beginning of the setup process, you will be informed that you should allow about 30 minutes for the process and that you should do the setup alone, in a quiet and safe environment. You will also be asked to have a pen ready for writing. Once you have all the requirements in place, click on the "Ok, I'm ready!" button.
Now it's time to connect the Ledger to your desktop computer using the provided USB cable. Once you've done that, the Ledger will automatically start up and tell you how to operate it using the two buttons on top. Press the right button to scroll to the right until the message "Set up as a new device" appears and confirm the selection by pressing both buttons simultaneously. After that, click on the "Next step" button to continue with the setup.
In the next step, you need to define your own PIN code, which must be 4 to 8 digits long. You will have to enter this PIN code every time you want to use the Ledger. Accordingly, you should select a PIN code that you can easily remember but which is not too easy to guess. Click on the checkbox to confirm that you understand that you have to select the PIN code yourself and keep it secret in order to continue with the setup. Then click on the "Set up PIN code" button.
Now you have to use the left or right button on your Ledger to select the first digit of the PIN code and confirm it by pressing both buttons simultaneously. Repeat this for all the following digits of your PIN code. In addition to the digits, you have the option to use the check mark to complete a PIN code with less than 8 digits. By selecting the remove icon, you can delete a previously entered digit.
After you have set the PIN code, you need to repeat the entry to confirm it. Then click on the "Next step" button to continue with the setup process.
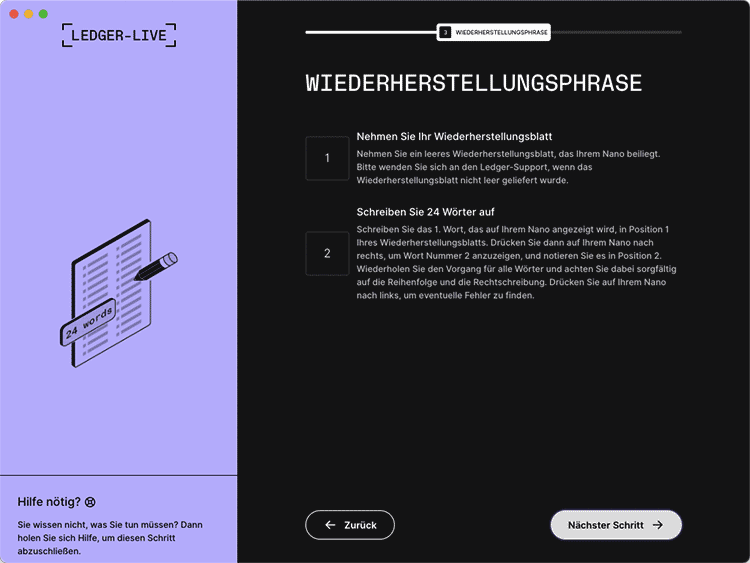
Now you will be asked to write down an unique combination of 24 words, the so-called "recovery phrase". This phrase will be generated by your Ledger and need to be stored safely in a secret location. Should you lose your Ledger at some point or should the Ledger break, you will need this recovery phrase to still be able to access your cryptocurrencies or NFTs, also known as "Assets". For this reason, it is extremely important to keep this recovery phrase secret and not to share it with anyone else, as anyone who knows the recovery phrase can access your assets without being in possession of your Ledger. Conversely, if you lose the recovery phrase and the Ledger itself, you will no longer have access to your cryptocurrencies and NFTs.
By activating the checkbox, you confirm that you have understood this principle and will handle your recovery phrase with appropriate care. Then click on the "Recovery Phrase" button.
Now take a pen and one of the recovery sheets to write down your individual recovery phrase. Your Ledger will now display 24 words that you need to write down in the recovery sheet one after another. Write the first word at position 1 of the recovery sheet, the second word at position 2, and so on. Use the right button on your Ledger to scroll to the next word and the left button to scroll back to the previous word. When taking notes, pay close attention to the correct order and spelling of the words.
After you have written down all 24 words, we recommend that you check the words again in reverse order to make sure they are correct. When you are done, click on the "Next step" button.

The next step is to verify that you have written down your recovery phrase correctly. Your Ledger will now present you different words to choose from. One of them will match the word you wrote down at position 1. Use the left and right buttons on your Ledger to find the correct word. Once you find it, confirm it by pressing both buttons on your Ledger at the same time. Repeat this process for all 24 words you wrote down.
Once you have confirmed all the words, click the "Next step" button. You will then be shown the correct way to use the recovery phrase. It is important to note that you should never enter these 24 words on a computer or smartphone, nor should you share them with anyone, including the Ledger company itself. In addition, you should never under any circumstances digitize your recovery phrase, for example by taking a photo of it. This carries the risk that hackers could gain access to it.
By clicking the "Ok, I'm done!" button you confirm that you have correctly noted your recovery phrase and understood how to use it properly.
Finally, your Ledger will undergo an authenticity check. To do this, click on the "Check my nano" button in the next step. This check may take a moment. After a short time, you should see a message confirming that your Ledger is genuine and ready to use with Ledger Live.
Step 4: Install the Ethereum app on your Ledger
After successfully setting up your Ledger, you can now connect it to Ledger Live. To do this, you need to grant access to Ledger Live on your Ledger device. Once you have done this, you should be able to see the software's home screen on your desktop computer.
On the left side of the menu, select the item "My Ledger" to manage your installed apps or install new ones. If you want to use the Ledger to purchase NFTs, you should install the "Ethereum (ETH)" app, as most NFT collections are published on this blockchain, including those of Maggy and Jules. In addition to NFTs, you can also receive and send the cryptocurrency Ether using this app. If you want to use other cryptocurrencies such as Bitcoin, you will need to install the corresponding app(s) for them here.
To install the app, click on the "Install" button next to it. You will then receive a message confirming that the app has been successfully installed and that you can now add a new crypto account.
Then select "Portfolio" in the menu on the left and click on the "Add account" button there.
A window will open where you need to select the cryptocurrency for which you want to add an account. In our case, this is "Ethereum (ETH)".
Select the previously installed Ethereum app on your Ledger and open it by confirming the "Open app" notification by pressing both buttons simultaneously.
Now, click on the "Add account" button on your desktop PC. You should see a confirmation message that the account has been successfully added. Next, you need to adjust the settings to choose your preferred currency, and your Ledger will be ready to receive or send Ether or NFTs.
Congratulations! You have successfully set up your Ledger Nano S Plus 🎉


